How to use speech-to-text in Google Docs
Accessible and easy to use speech-to-text software

Speech-to-text software has come along way in recent years. We remember even a few years ago when voice typing required strange voices and mouth movements that looked like they belonged in a Saturday Night Live sketch.
Today, however, more and more businesses are incorporating voice typing into their business operations. It can be an easy way to save time and increase the productivity of your employees and can be crucial in making your business accessible to persons with disabilities.
In this article, we explain how to use voice typing software on Google Docs. Although it is not the best speech-to-text software, it is free and easy to use, and will serve many businesses’ purposes.
How to use speech-to-text in Google Docs: Preparation
Google’s speech-to-text software currently only works on the Google Chrome browser. If you already use Chrome, you won’t need much preparation at all, and you won’t have to download or install any additional software or plugins. However, if you don’t have Chrome, you’ll have to download it via this link.

The only other thing you’ll need to do before you can begin using Google’s speech-to-text software is to set up your microphone. Using the in-built microphone on your device will suffice most of the time, as Google’s dictation software has improved significantly in recent years.
However, if you’re planning on dictating a lengthy text, or plan on using Google’s dictation software every day, we’d consider investing in a high-quality microphone. An external microphone will enable Google to interpret your voice more easily and can be placed in an optimal location.
Once you’ve downloaded Chrome and prepared a microphone, you’re ready to go.
Are you a pro? Subscribe to our newsletter
Sign up to the TechRadar Pro newsletter to get all the top news, opinion, features and guidance your business needs to succeed!
Step 1: Open a new Google Docs file
Open Google Chrome on your device and head to the Google Docs website. If you’re not currently logged into your Google account, go ahead and log in now.
After you’ve logged in, create a new Google Doc. For our test, we named it “Speech-to-text in Google Docs - Test”. Ensure you save the article in a location where you’ll be able to access it later (to either edit or delete it).

Step 2: Open the voice typing window
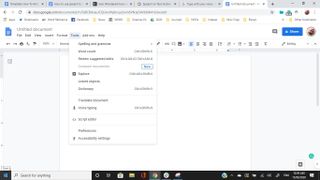
Within this blank document, you should be able to see the menu options at the top of the window. To begin voice typing, click on the Tools menu option and then Voice Typing. You can also open the Voice Typing window by using the keyboard shortcut Ctrl+Shift+S.

Step 3: Grant Google Docs access to the microphone
If you’ve never used Google’s speech-to-text software before, you’ll need to grant the platform access to your microphone. On Google Chrome, this is a simple as clicking “allow” when prompted.
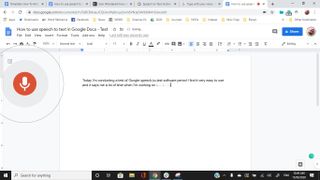
Once you’ve clicked “allow”, the microphone symbol will change to red. Congratulations –you’re now using voice typing!

Step 4: Begin voice typing
With the microphone symbol changed to red, you can now begin speaking in a natural voice and watch as Google transcribes your voice to text. Unlike with older speech-to-text software, there’s no need to speak robotically, or at a comically slow pace. Google’s dictation software is designed to understand natural speech. Our only suggestion is to clearly enunciate lengthier or more complicated words, as these are where the software most often struggles.
Following these four steps alone will enable you to begin voice typing, saving time and energy that could be better spent elsewhere. After playing around with the software, you’ll quickly become comfortable with it and develop your own strategies for accurate and reliable transcription.

However, if you want to take your voice typing to the next level, read on to discover some of Google’s advanced voice commands.
Step 5: Voice commands
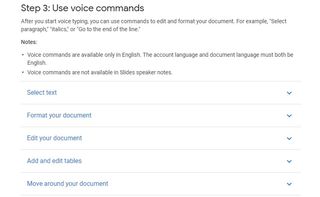
Google Docs also features several voice commands that enable you to create professional documents using only your voice. We’ll now explore a few of the most useful commands, but you can find the full list here.
The voice commands you’ll use most often are mostly self-explanatory. Saying the command “period” will insert a period into your document, while saying “bold” or “italic” will change the style of text correspondingly.
Formatting is also simple using commands such as “insert page break”, “insert horizontal line”, or “insert heading”, among many others.
Users can also change the text color by saying “text color (insert color)”.
Developing a mastery of these voice commands enables you to make the most of Google’s speech-to-text software, and ensures you and your employees can work faster and more effectively when voice typing.

Summary
Voice typing software has improved dramatically in recent years. In the past, businesses had to invest in expensive dictation software if they wanted a functional voice typing experience. And even then, there were limits on what such software could achieve.
Today, Google’s voice to text software enables businesses to incorporate voice typing into their operations free of charge. The software certainly isn’t the best available, but for most organizations, Google’s voice typing will more than suffice. We think that the extensive list of voice commands make the software appealing for employers and employees alike.
- We list the best text-to-speech software.

