Monster Hunter Rise advanced guide: tips and tricks for High Rank and beyond
Fancy a challenge? Then this Monster Hunter Rise advanced guide is for you
Monster Hunter Rise beginner's guide: tips and tricks for getting started
Fancy a challenge? Then our Monster Hunter Rise advanced guide is definitely for you. Once you’ve polished off the Village quests in Monster Hunter Rise and got the upper end of Low Rank in the Hub Quests, things are going to start heating up – and they’re going to heat up fast.
Similarly to other Monster Hunter games, the High Rank hunts you’ll start going on shift in difficulty: monsters get smarter, they start using new moves, they start hitting harder, and you start racking up carts more rapidly as you progress through difficulty levels. If you’re unprepared, you can very easily hit a wall.
There are a few essential things you can do to elongate your lifespan, though. Knowing how to properly counter monsters and their weaknesses whilst better acquainting yourself with Monster Hunter Rise’s more complicated or dense mechanics is going to save your life. If you’re tired of eating a face full of Rathalos fireball, or sick to the back teeth of being impaled by the icy hands of a particularly furious Goss Harag, we’re here to help. Read on for all the tips and tricks you need to know to repel the Rampage and keep Kamura Village safe for another day.
- Check out our full Monster Hunter Rise review
Craft the Armortalon and Powertalon
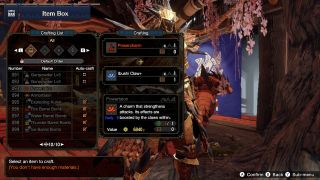
Similar to the Armor Charm and Power Charm in our Monster Hunter Rise beginner's guide, the High-Rank version of the free boosts becomes available after you’ve cleared the 6* Urgent mission that crops up in the Hub roughly halfway through your 6* missions. Once you’ve beaten an end-game boss, you can buy another Armor Charm and Power Charm (buy to your Item Box if you already have some in your Pouch).
To make the Talons, you’ll require an Ibushi Claw+ per item – which you’d likely have gotten as Quest Rewards for the Urgent mission. The crafting cost and purchase cost for more Charms is money, but it’s worth it long-term. And what is money at this stage other than for upgrades, anyway?
Invest in Decorations
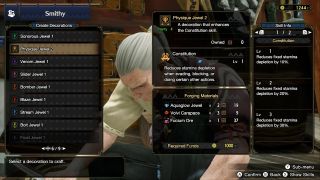
Veteran Monster Hunter fans will shudder in horror when they remember waiting forever to get a decent Attack Jewel or something in order to finish off their incredible DPS build with that perfect flourish. Monster Hunter Rise imports the size/slot mechanics for Decorations from World, and you can manually craft the Decorations you need (at the expense of some materials, of course), removing the RNG from proceedings. So, say you’ve got a decent Poison build with that Pukei-Pukei Sword and Shield you’re running, you can craft a Decoration that’ll make you hit harder with poison and slot that into your armor.
Just be aware that some of the leveled buffs have been bumped up a slot size, so if you want to get a huge Attack Boost, you may be out of luck with one-slot armor parts. It looks like Capcom wants you to use Decorations to negate weaknesses in your armor, rather than top up your strengths. Bear that in mind when you plan your builds.
Get daily insight, inspiration and deals in your inbox
Get the hottest deals available in your inbox plus news, reviews, opinion, analysis and more from the TechRadar team.
Experiment with Switch Skills
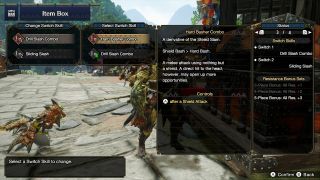
A lot of Monster Hunter Rise’s newly arcade-y action is built around Switch Skills. You get your first in Low Rank, you get your second in High Rank and then your third is locked behind an optional High-Rank quest. More often than not, these third-weapon style options allow you to change a fairly significant part of your moveset that can work wonderfully in certain co-op and multiplayer setups – they’re reflective but more freeform versions of Generations’ Styles, if that helps you visualize how it all works.
If you’re a co-op player, the third Switch Skill can help you play more defensively and pull aggro to give your mates more chances to attack. If you’re in single player, you might find the third Switch Skill gives your general moveset more mobility, letting you do better hit-and-run attacks and better avoid a monster’s more aggressive, wide-ranging attacks. Never be afraid to experiment – Rise’s movesets are this customizable for a reason!
Never pass up a chance to Ride
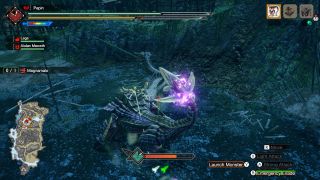
Things are getting harder to craft, and suddenly weapons and armor need gems and plates – and a ton of cash – in order to come out of the blacksmith’s forge. You need materials, pronto. Ride everything: even if you’re toe-to-toe with a Rathian and a Tigrex comes in to see what’s going on, chances are one of them will fall over in seconds. Get close, mount it, and learn to Wyvern Ride properly: parry, time your attacks and let the big X+A ultimate do its work once you’ve charged it up.
Every powerful monster vs. monster attack has a high chance to dislodge something precious – and it could even be a plate or a gem. If you mount a monster and then your prey scarpers across the map, follow it: you may as well, the mounting timer is generous, and for the sake of a few seconds, getting a 1% drop may be worth it…
Rethink Rampage

Now that Apex monsters and some incredibly persistent dragons are starting to appear in your Rampage missions, it’s time to bring out the big guns – literally. Do what you can to keep your first few waves of drone monsters at bay (Counter Gongs, auto-turrets and Wyvern Riding will all help here) and ready yourself for the big boss that comes barreling in for the final wave.
If you're playing in co-op, it’s worth pre-empting the Apex arriving during the second-to-last wave and setting up the second area as soon as possible. Send a player back to the main gate via Farcaster and get your defenses primed – auto-turrets, ballistae, et al – and keep that final barricade as safe as possible, as soon as possible. By the time the Apex monster gets to your last gate (and it will!) make sure to have your Dragonator and Wyvern Fire weapons lined up. These are key, and do some lovely DPS – just beware of the cooldowns. Hit the Counter Gong when you can, and deploy named NPCs on platforms near the monster when you do – you can rack up some quick, dirty damage this way.
- Nintendo Switch vs Switch Lite: is bigger really better?
