Here's how to launch your own self-hosted business blog
Use Ghost to orchestrate the content strategy for your business

A blog usually acts as the central communications platform for virtually all businesses that need to interface with their users.
Everyone from software vendors, to hardware retailers need a content management system (CMS) that’s not just easy to use and administer, but also versatile enough to evolve with their changing requirements.
Ghost is an open source, headless, Node.js-based CMS that can help businesses of all sizes rollout an effective medium to engage with users.
- Here are the best blogging platforms
- We've also highlighted the best web hosting services
- Looking for blogging ideas? Check our guide to help you write your first blog post
While Ghost is most popular for blogging, it ships with tons of useful features to deploy all kinds of online publications. It has SEO and social media features built directly into the core itself, and is flexible enough to be either used individually or with a bunch of collaborators.
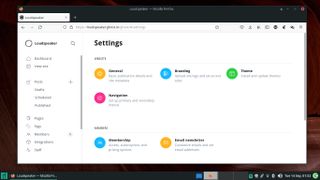
Installation
Ghost offers multiple hosting options.
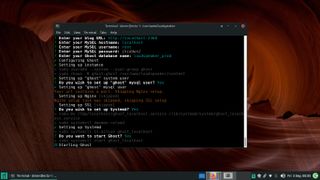
For self-hosting Ghost the developers recommend using an Ubuntu 20.04 LTS release as a base, on a computer with at least 1GB of RAM, though you’ll get a better experience and mileage with 4GB of RAM.
The process of building the server is well-documented and typically involves pulling in supported releases of the MySQL database server, the Nginx web server, and a 14.x series release of Node.js.
Are you a pro? Subscribe to our newsletter
Sign up to the TechRadar Pro newsletter to get all the top news, opinion, features and guidance your business needs to succeed!
You can also host Ghost with the help of a VPS hosting provider. Ghost officially partners with Digital Ocean, who also offer a pre-made Ghost image to ease deployment.
The easiest option however is the fully-managed Platform-as-a-Service (PaaS) offering from the project itself known as Ghost(Pro). The service is powered by the exact same open source codebase, and takes care of deploying and managing your Ghost installation, while offering security features and conveniences such as SSL certificates, server updates, backups, and more.
Ghost(Pro) offers multiple pricing plans depending on your requirements, and there’s also a 14-day trial plan that you can use to tinker with the platform.
Initial configuration
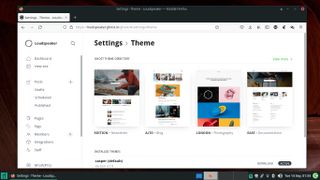
Unless you are using the PaaS edition of Ghost you’ll have to spend some time setting up your Ghost installation as per your liking. The process is fairly straightforward since the entire Ghost installation is controlled via a single configuration file.
If you’ve followed the Ghost installation process, you’ll already have a custom configuration file installed by default. The file has several configuration options that you can tweak and customize according to your environment.
Certain parameters in the configuration file are required, such as the ones that specify the public URL of your blog, and the type of database being used, while several others are optional, which you can tweak once you’ve clocked some mileage with Ghost and are familiar with its operation.
One such parameter is storage adapters, which control the location of the images on your blog. By default, the images are stored in the filesystem, but you can customize the parameter to store them on Amazon S3, Google Drive, Google Cloud Storage, Azure Storage, GitHub, or on several other locations.
One tool that all Ghost admins must get comfortable with is Ghost-CLI. Not only does it help you install Ghost, it’ll also help you update your installation, and assist in regular maintenance tasks.
For instance you can use ghost config [key] [value] to add a value to your Ghost configuration file. Similarly, you can use ghost update to check and update your installation to the latest Ghost release.
In case an update breaks your installation, you can revert to the previous working version with ghost update --rollback. If you are facing issues with your installation, use ghost doctor to troubleshoot and diagnose potential issues.
Note however, that while the project usually puts out a new release every couple of weeks, which you can switch to with ghost update, every 12-18 months there’s a major release, which breaks backward compatibility and requires a more involved upgradation process.
Customize your blog
Once you’ve set everything up, it’s time to customize your blog.
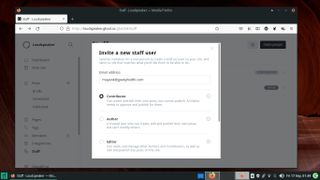
By default, the user that you added while setting up Ghost is the owner who has unfettered access to the publishing platform. One of the best things about Ghost is that it enables you to share publishing and administering duties with other users.
Ghost supports five different types of staff users that have access to the admin area with varying levels of permissions for what they can do.
Besides the default user, who is the Owner, there are Administrators who have just about the same level of access as the owner. Then there are Editors, who can invite, manage, and edit the content created by Authors, as well as Contributors, who too can write posts, but don’t have the permission to publish them.
To add staff users, head to Dashboard > Staff, which will bring up a list of all current staff members. Click the Invite people button and enter the email address and select one of the predefined roles to send mail invites to other staff members.
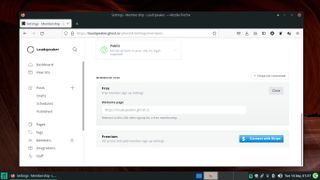
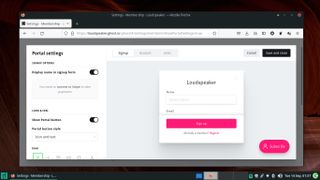
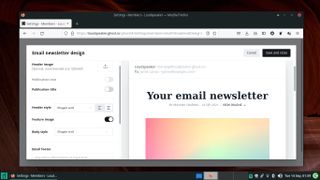
Another interesting feature in Ghost is Members feature, which can help you monetize the content via paid subscriptions and email newsletters.
Members can sign up with their email address by clicking the Subscribe button on your blog. After verifying their account, members can access the content matching their access level.
Ghost supports three different membership levels. There’s public content, which is accessible to all users even if they haven’t registered as members, while members only content is shown only to logged in users.
The paid-members content is exclusively for paying members. For this to work though, you’ll have to connect your Ghost publication with Stripe for processing and handling payments. While the process to connect Stripe with Ghost isn’t cumbersome, it won’t work unless your blog has a SSL certificate.
Start publishing
With everything set up, it’s time to publish your first post.
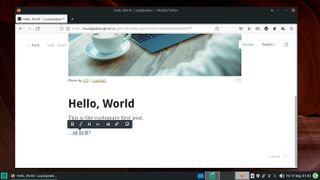
Ghost has an intuitive WYSIWYG editor that offers all the familiar formatting options, along with the ability to easily pull-in all kinds of dynamic content.
To begin authoring a post, head to the Dashboard and click the + icon adjacent to the Posts section. Enter a title of the post in the space provided and simply begin writing the body of the post in the provided space.
To format the text you can invoke the contextual toolbar by selecting the text you want to format. The contextual toolbar has the usual text formatting options.
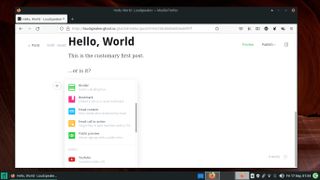
To add dynamic content to your post, press the + icon that appears on every new line. This brings up the dynamic menu, which offers options to insert images, create image galleries, email-only content, embed content from external websites such as YouTube, Vimeo, Twitter, Spotify, and more.
Conclusion
Once you’ve got a hang of writing posts, follow the tutorials on the project’s website to familiarize yourself with other Ghost features and use them to flesh out your publication.
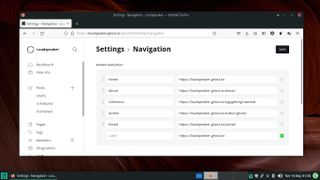
For instance you can add a contact form, or use Ghost secondary navigation functionality to add social network links to your publication. If you write long-form posts, you can use the reading_time helper to display a reading duration to your posts.
Helpers are tags in Ghost’s templating language that you can use to add useful functionality to your publication.
Before you announce your Ghost publication to the world, make sure you’re using an SSL certificate, and have secured MySQL (running mysql_secure_installation should do the trick).
Also remember to lock down your server by properly configuring the firewall to block all services except ssh, nginx, http, and https. If you’re expecting a lot of traffic, Ghost developers suggest adding a CDN in front of your Ghost installation.
- New to blogging? Check our extensive guide for blogging beginners
With almost two decades of writing and reporting on Linux, Mayank Sharma would like everyone to think he’s TechRadar Pro’s expert on the topic. Of course, he’s just as interested in other computing topics, particularly cybersecurity, cloud, containers, and coding.

